Most of the time, we don’t think about the air we breathe because we can’t see it. But indoor air can be more sometimes polluted than the air outdoors. It’s because of human activities, the products we use, and outdoor pollution from outside. Polluted air can really affect our health.
To help with this, I made a device. It has sensors to check indoor air quality and has a mobile app to show the readings in an easy way.
The device
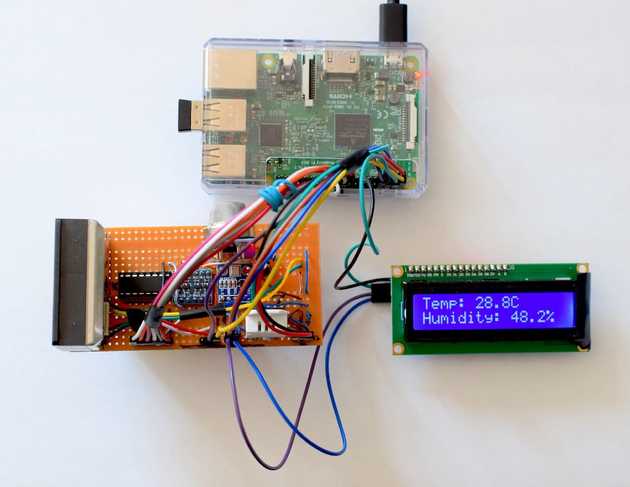
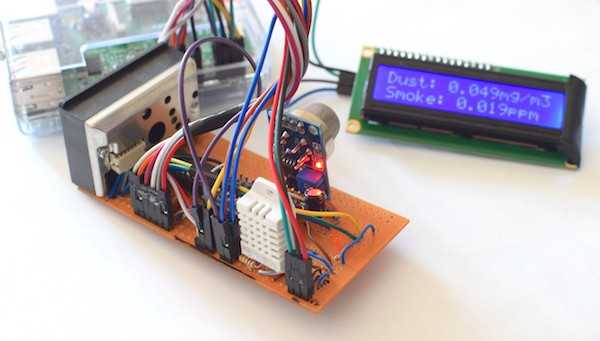
I wanted to make the device affordable, so I used a Raspberry Pi and four low-cost sensors:
- DHT22 - temperature and humidity sensor
- BMP180 - barometric pressure sensor
- Sharp GP2Y1010AU0F - optical dust particles sensor
- MQ-2 - CO, LPG and smoke sensor
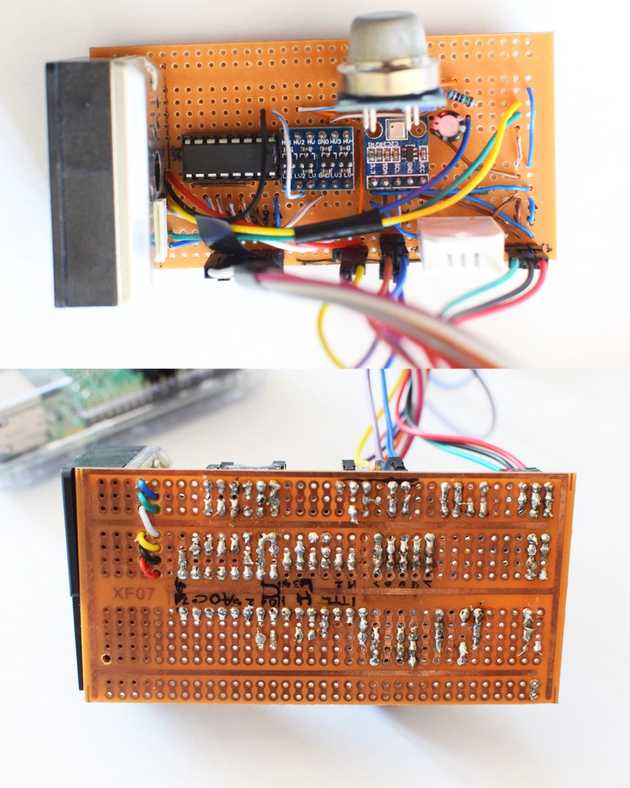
I soldered all of the sensors onto a board and connected them to the Raspberry Pi using GPIO pins. Since Raspberry Pi is only capable of reading the digital signal, I had to convert an analog signal into digital. To do that, I used a low-cost, 8-channel, 10-bit analog-to-digital converter. Sorry for my messy soldering ;)
Software
To read the sensor measurements, I wrote a small script in Python which runs on the Raspberry Pi. It collects data from all of the sensors and stores them in an external database. The collected data can then be used for analysis. For some of the sensors, I used open-source Adafruit libraries. They allowed me to easily access and read sensor measurements to later present them in a user-friendly form.
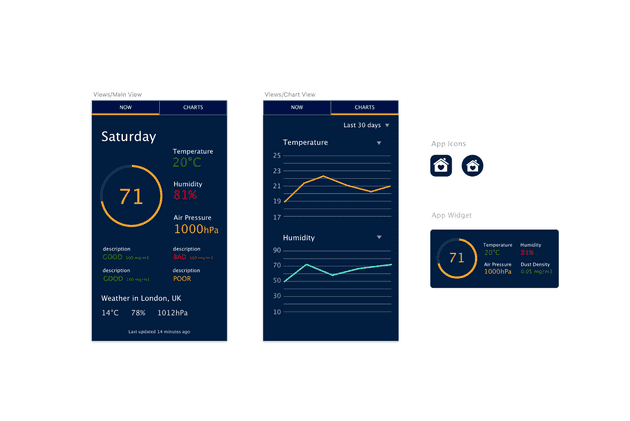
I also made a mobile app using React Native. It shows the air quality data in an easy-to-understand way.
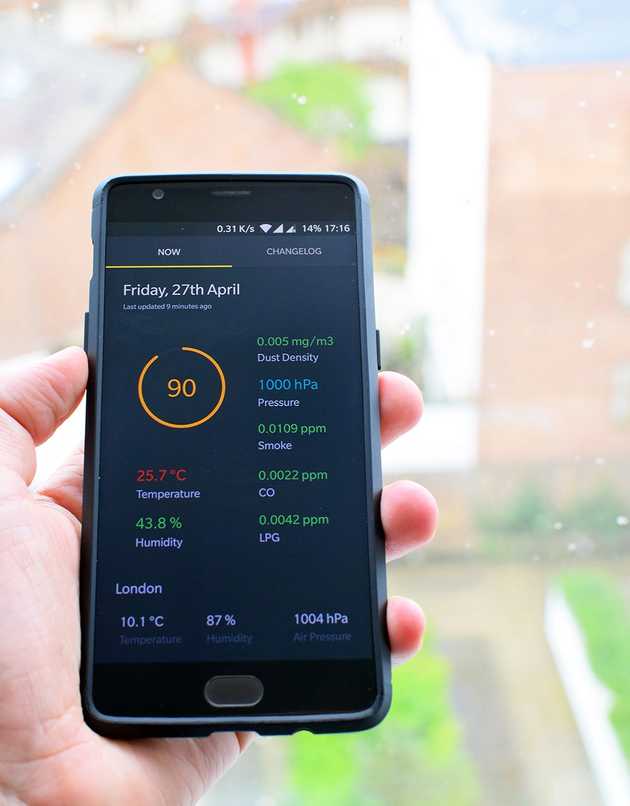
On the main screen, I opted for colour scales and an index score, which help users to understand the air quality readings at a quick glance.
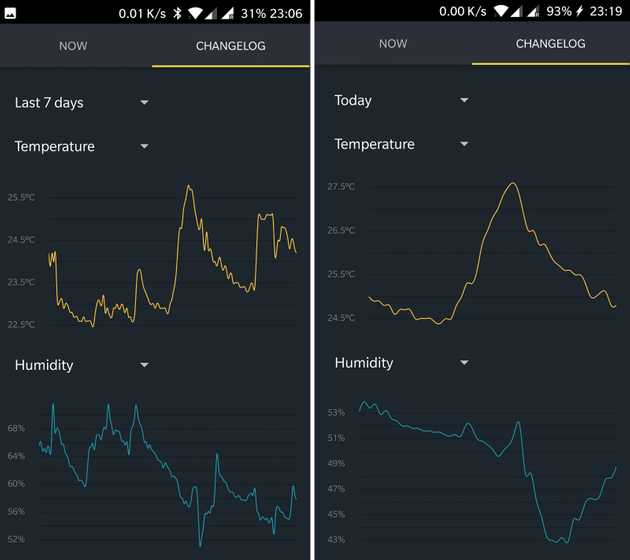
The user can then tap through to a second screen. This shows the data logged over a period of time, which is presented in a visual way using simple line charts so that the user can see and make sense of the patterns in the collected data.
I also created an API in Node.js, which is used by the mobile app to query data from the external database. I decided to store data in the external database so that I could access it from anywhere, even when the device is switched off.
Testing
During various types of testing, the device was able to detect an increase in the level of fine particles while using a vacuum cleaner or peaks of relative humidity caused by some specific human activities indoors, such as taking a shower.
Another test was done outdoors. I evaluated my own measurements against open-source weather data and most of my own readings were very similar to the results from the public weather API. it allowed me to determine the accuracy and precision of sensors used in this project. Additionally, this test showed different conditions that can be observed outdoors as well as more frequent changes, which usually takes more time to spot inside a building.
Next Steps
Although the sensing system I created cannot be relied upon when, for example, detecting gas concentrations, it’s still useful for improving indoor air quality.
Further extensions can be made to the device, such as building a custom case or implementing additional sensors. Another possible improvement would be to replace the current optical air particle sensor with a more accurate laser-based sensor, which uses the light-scattering method to detect and count particles.
Conclusion
Overall, I’m happy with the air quality sensing system that I developed. Even though there are limitations because of the use of low-cost air pollution sensors, it has shown significant potential. Since it has the capability to track major air pollution factors, I’m planning to continue to use it in order to improve indoor air quality at home.
Setup
If you want to make your own, here’s what you’ll need:
- Raspberry Pi 3
- Micro SD memory card
- USB power adapter
- Analog to digital converter MCP3008
- Temperature and humidity sensor DHT22
- Barometric pressure sensor BMP180
- Optical dust particles sensor Sharp GP2Y1010AU0F
- CO, LPG and smoke sensor MQ-2
- 16x2 LCD display
- Wires and circuit board
The total cost of all components and the Raspberry Pi was around £60.
I want to give a shout-out to Raspberry Pi community and to all people who use Raspberry Pi and share their projects and knowledge. Many of the projects made with a Raspberry Pi are openly available and very well-documented. During this project, I read many articles and tutorials, which helped me improve my knowledge of the tools available and, in turn, helped me develop my own device. It is extremely inspiring to see what people do with those tiny computers, and the help that people offer when you run into any problem is both kind and reassuring.
Thanks for taking the time to read my blog post. Don’t forget to share your project if you’re building something with Raspberry Pi!
